Models>
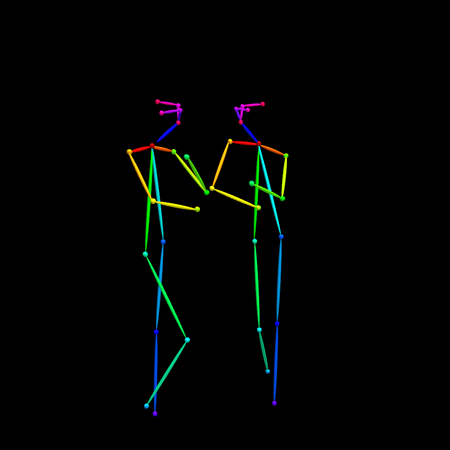
DazStudioG8_OpenPoseRig
Quick Generate


Model Description by Creator
G8 OpenPoseRig, Final version, (barring bug fixes), V1.0
Bunch of QOL fixes.
Eliminated the 'prop bones' and managed keep the torso from exploding without them, should make it more suitable for exporting. Very weird poses can cause the torso bones to stick out at the neck but who bends both forward and backwards at the same time eh?
Some quality of life refinements on the icons. Improved the skeleton thickness options. More shaping morphs, most proprtions can be adjusted in some way. If theres something you can't get it to do try scaling the bones individually.
It will fit to G8F without complaint now. If you add extreme morphs the skeleton mesh will distort due to the morph projection not being able to get a 1:1 correlation but it will be usable for most things, even if it is a bit lumpy. Honestly you're better off matching the proportions using the sliders without fitting it, then saving that as a pose/morph preset.
Anyway, here it is, as the French say.
.................................
I suck at tutorials, so if anyone can write up a good work flow please do so. I'll post it in the main text.
In the meantime it helps to read the version details from newest to oldest.
Basically just a Pose Control stick figure rigged for G8, in the form of a scene file for Daz Studio. (daz3d.com)
(Thanks to sdimg for the following guide)
Here's a rough guide to using daz for pose and depth maps...
I know everyone would like a good easy to follow tutorial and i would as well but for now these links and info should be helpful to point you in the right direction.
For controlnet in general and the part on using openpose and depth maps...
A1111 ControlNet extension - explained like you're 5
There's plenty of good guides on youtube as well.
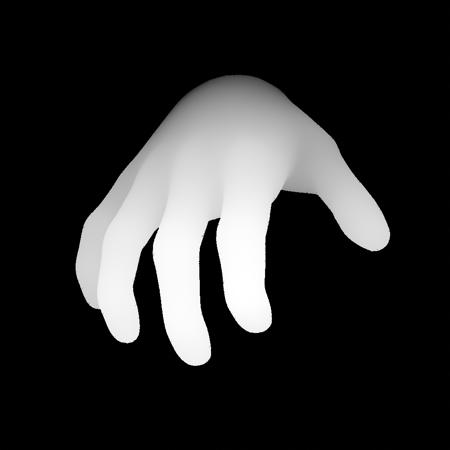
Using daz3d to propely render out depth maps as .exr files...
Quick and dirty depth map guide for Daz3d to ControlNet
Note: This guide is missing the part where you need to invert the depth map so white is nearest to camera.
Also it's no good for those without photoshop so i got a free way as well.
Converting .exr to a normalized and inverted .png file for controlnet with blender and gimp...
Watch the first five to ten minutes of this to get the basics of blender compositor.
Switch blender from filmic color to standard in right panel. Render Properties > Color Management > Standard
Turn on node wrangler in addons as shown in above video and add the viewer node.
Add an image node to compositor and select your .exr depth map from daz3d, connect it to a normalize node and connect that to both the Viewer and Compositor nodes.
If it's working correct you should see your depth map appear as a nice gradient in the background of the compositor.
Go to the top rendering tab and save out as the default png file.
Open it in gimp or similar paint program and invert it and overwrite save.
Use depth map in controlnet with 'none' selected under preprocessor and the depth model along with the pose image from daz and a openpose model in the second controlnet.
Watch video on using multi controlnet if need be.
Note: I tried doing it all in either gimp or blenders compositor but both had issues getting a properly normalized and inverted png out.
Maybe someone else can come up with a easier solution?
Hopefully this will be helpful to at least get going and maybe someone else will be able to make a proper tutorial.
Oh and of course don't forget you can just use the nicely rendered depth maps from daz with any characters or scenes you like with amazing results!
The pose rig will give a bit more variety to stable diffusion outputs though so it's great for that. :)
Also here's a similar good free rig for blender with guides that may also be helpful...
https://toyxyz.gumroad.com/l/ciojz
From Daedalus_7 regarding using Iray in DAZ Studio
To make sure that the hands (and or feet) are properly represented by SD, make sure to render them separately from the skeleton with a Depth Map.
Render Settings to get a good Depth Map:
1) Render Settings > Editor > Filtering >
set the Pixel Filter > Mitchell
and the Pixel Filter Radius to 0.1
2) Choose a high resolution (~1000 pixels on a side).
See their comment for pics.
............................................
Corrected the missing 'Product' folder issue for v0.7. Thanks gurilagardnr
Fixed that in v0.7.1, my bad for leaving a folder out.
.............................................
Now with slightly more standard packaging and added G3 rig support via morph slider. Saves a lot of time on having to convert G3 Poses. Simply apply the morph and then apply the pose, animation or aniblock.
Unzip the package into your 'Content' directory as with any Non Daz Install Manager content, (or whatever you have it named, mine's called 'Genesis')
You'll find the figure in \Figures\RoguePilot\OpenPoseRig_v0.7, I've included the full scene, and individual files for the solo figure, lights and render settings. For some reason there seems to be no way to save out the backdrop colour as a separate element so you'll have to set that to black yourself if using anything except the full scene.


